Processo di costruzione in pietra di muri di sostegno e muri panoramici
Jan 06, 20251. Flusso del processo
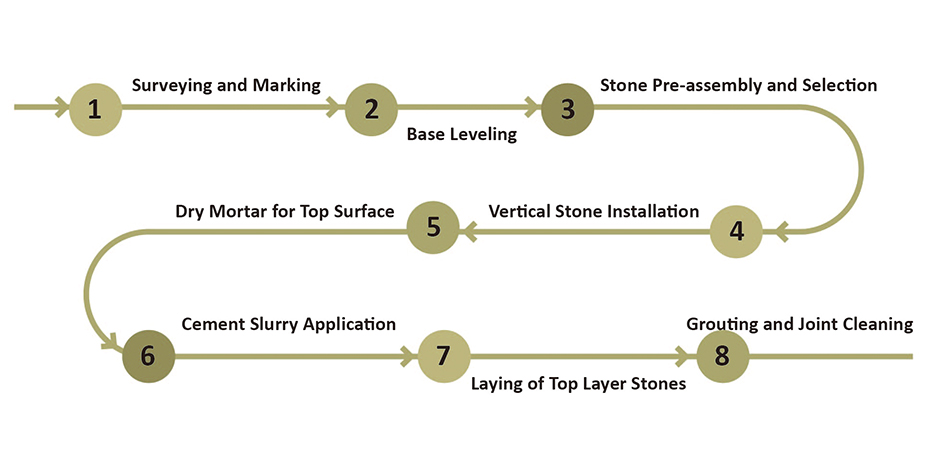
1) Rilievo e marcatura:
Prima dell'installazione della pietra per il muro scenico e il muro di contenimento, effettuare un rilievo lungo la linea mediana (o confine) del muro in base alla quota progettata, impostando un punto di controllo ogni 5 - 10 metri. Le misurazioni devono essere eseguite in base al layout di progettazione o ai disegni costruttivi, contrassegnando la linea centrale, le linee di livello orizzontali e le linee della griglia.
2) Livellamento base:
In base alla posizione e all'elevazione misurate, livellare la base. Se la base presenta difetti, utilizzare malta cementizia (per le pareti) o calcestruzzo frantumato (per la superficie superiore) per livellare e trattare la base.
3) Preassemblaggio e selezione delle pietre:
Tutte le pietre utilizzate nel progetto devono essere lavorate in fabbrica secondo il disegno del layout, numerate e imballate. Dopo che le pietre arrivano in loco e vengono disimballate, ogni pezzo deve essere controllato singolarmente. Le pietre rotte o con angoli mancanti devono essere separate e rilavorate dalla fabbrica.
Una volta completata la selezione della pietra, preassemblare in loco. Il preassemblaggio garantisce che i colori, i motivi e le trame siano allineati e che le cuciture corrispondano perfettamente. Le pietre preassemblate dovrebbero essere numerate in due direzioni e immagazzinate in pile secondo le categorie per un uso futuro.
4) Installazione verticale della pietra:
(1) Pietre di piccole dimensioni:
Su un fondo umido, applicare una mano di boiacca cementizia pura (con il 10% in peso di colla 108 mescolata con acqua) e applicarla mentre è ancora fresca.
Per la malta di fondo utilizzare cemento-sabbia in rapporto 1:3, spessore circa 12 mm, applicata in due strati: il primo strato di circa 5 mm di spessore e il secondo strato di circa 7 mm. Dopo che la malta di base è stata compattata e levigata, grattare la superficie della malta.
Una volta impostata la malta di base, segnare le linee per ciascuna sezione di pietra. Applicare una boiacca di cemento spessa 2-3 mm (con il 20% in peso di colla 108) sul retro delle pietre pre-bagnate e installarle (in alternativa è possibile utilizzare polvere adesiva). Toccare con un martello di legno per garantire l'allineamento e utilizzare uno strumento di livello per verificare la planarità e la rettilineità.
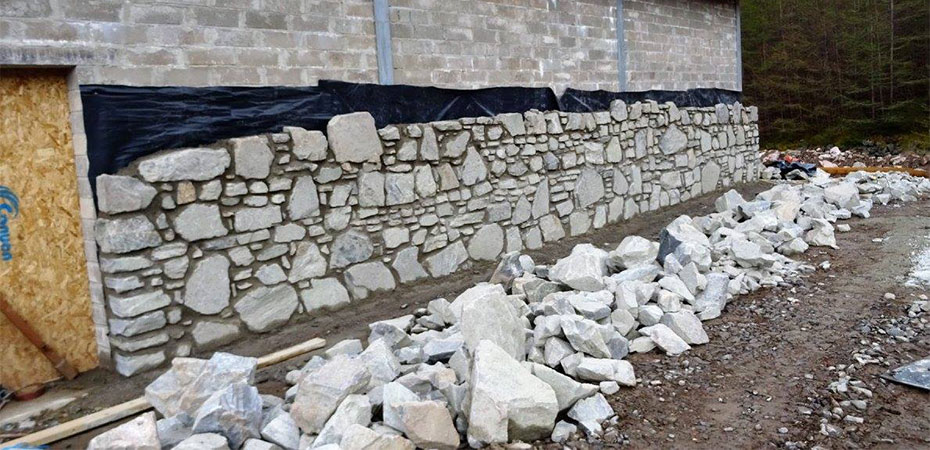
(2) Pietre di grandi dimensioni:
Per pietre più grandi di 40 mm su qualsiasi lato, o se l'altezza di installazione supera 1 m, viene utilizzato il seguente metodo di installazione:
A. Foratura e scalpellatura:
Prima dell'installazione, utilizzare un trapano per praticare i fori in base ai requisiti di progettazione. Fissare un telaio di legno per allineare la punta del trapano con il bordo superiore della pietra. Praticare dei fori a 1/4 della larghezza della pietra da ciascuna estremità. Per ogni superficie praticare due fori del diametro di 5 mm e della profondità di 12 mm. Il centro del foro dovrebbe trovarsi a circa 8 mm dal retro della pietra.
Se si utilizza il granito e la larghezza della pietra è elevata, aumentare il numero di fori. Dopo la perforazione, scalpellare leggermente una scanalatura profonda 5 mm attorno ai fori per formare una forma a "tronco di elefante" per incorporare filo di rame o zincato.
Per le pietre più grandi, in particolare il granito prefabbricato, se è difficile legare il filo di piombo zincato o il filo di rame all'estremità inferiore, utilizzare una smerigliatrice piccola e sottile portatile (4 - 5 mm) per creare scanalature (lunghe circa 3-4 mm e larghe 12 mm). di profondità) a 1/4 di altezza della pietra sia sulla superficie superiore che su quella inferiore.
B. Infilatura di filo di acciaio o filo di piombo zincato:
Tagliare il filo di rame preparato o il filo conduttore zincato ad una lunghezza di circa 20 cm. Fissare un'estremità nel foro praticato con resina epossidica e un cuneo di legno, fissandola saldamente. L'altra estremità deve essere piegata e posizionata nella scanalatura, assicurandosi che il filo non sporga dalla parte superiore o inferiore della pietra per consentire una cucitura stretta con le pietre adiacenti.
C. Legatura della maglia d'acciaio:
Per prima cosa rimuovere le barre d'acciaio incastonate nel muro e pulire l'area di installazione. Inizia legando un'armatura d'acciaio verticale (φ6) e fissandola al muro utilizzando le barre d'acciaio incorporate.
Per l'acciaio orizzontale, usalo per legare le lastre di granito lucido. Ad esempio, per una lastra alta 60 cm, la prima barra orizzontale viene legata a 10 cm dal suolo e utilizzata per fissare il filo inferiore di rame o zincato del primo strato di pietra. La seconda barra orizzontale è legata al livello di 50 cm, 2 - 3 cm sotto il bordo superiore della pietra, per fissare il filo di rame o zincato nella parte superiore del primo strato. Continuare ogni 60 cm con barre orizzontali aggiuntive.
D. Marcatura della linea:
Utilizza un filo a piombo per determinare l'allineamento verticale della parete di granito lucido dall'alto verso il basso. Considerare lo spessore delle lastre di granito, lo spazio di malta e la rete di acciaio. Lo spazio tra la pelle di granito e la superficie strutturale dovrebbe essere di 5 - 7 cm.
Dopo l'allineamento verticale, segnare il contorno dell'installazione in pietra sul terreno. Questo contorno funge da linea di riferimento per il primo strato di pietra. Posizionare le lastre di marmo o terrazzo prefabbricato lungo la linea di riferimento segnata con uno spazio di 1 mm tra ogni pietra (se specificato, regolare lo spazio in base al disegno).
E. Installazione in pietra:
Seleziona i pezzi di pietra, allinea il filo di rame o zincato e installa le pietre. Il bordo superiore della pietra dovrebbe essere leggermente inclinato verso l'esterno. Inserisci la mano dietro la pietra per legare il filo di rame o zincato nella parte inferiore della pietra all'armatura orizzontale.
Non tendere troppo il filo; lasciare un po' di gioco. La pietra verrà ancorata una volta applicata la malta. Posiziona la pietra in posizione verticale e fissa il filo superiore in rame o zincato. Utilizzare cunei di legno per stabilizzare la pietra e lasciare uno spazio di 30 - 50 mm tra la pietra e la base per la stuccatura.
Utilizzare uno strumento di livello per verificare l'allineamento verticale e la planarità. Se sono presenti spazi vuoti o irregolarità, utilizzare un foglio di piombo per imbottire e garantire una spaziatura uniforme. Assicurarsi che il bordo superiore del primo strato di pietre rimanga dritto.
Dopo aver confermato l'allineamento, preparare il gesso in una ciotola e applicarlo come una pasta tra i due strati di pietra per unirli insieme. Per stabilizzare le pietre possono essere utilizzati anche cunei di legno. Dopo che il gesso si è indurito, è possibile procedere alla stuccatura (se necessario, inserire tubi di plastica prima della stuccatura).
F. Stuccatura:
Preparare un impasto cemento-sabbia 1:2,5 e aggiungere acqua fino a creare un impasto con una consistenza di 8 - 12 cm. Versare lentamente la malta mentre si utilizza un martello di gomma per picchiettare delicatamente le pietre per espellere l'aria e garantire una corretta adesione.
Il primo strato di malta non deve superare 1/3 dell'altezza della pietra, generalmente circa 15 cm. È fondamentale garantire che la malta non causi lo spostamento delle pietre. Se qualche pietra si sposta, smontala immediatamente e reinstallala.
Dopo 1 - 2 ore verificare i movimenti prima di applicare il secondo strato di stucco, che dovrà avere un'altezza di circa 20 - 30 cm. Dopo l'indurimento iniziale, continuare a stuccare fino a quando l'altezza non raggiunge i 5 - 10 cm dalla parte superiore della pietra.
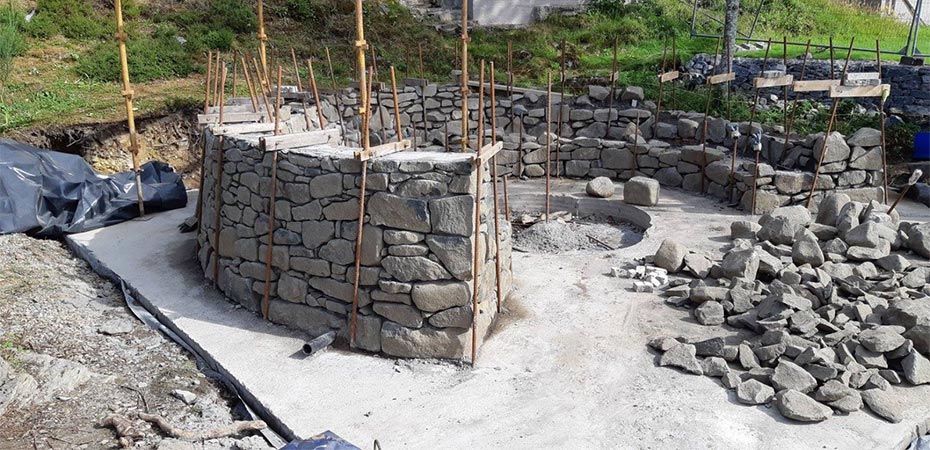
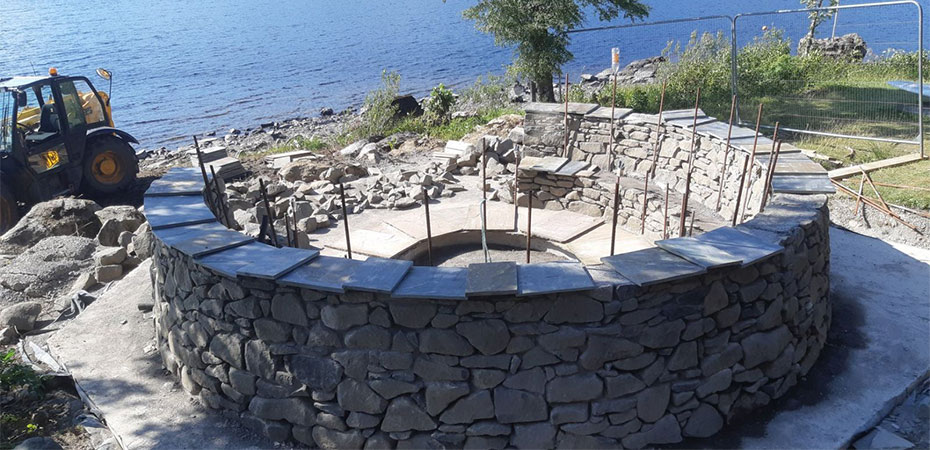
5) Posa delle pietre della superficie superiore:
Pulire le pietre e attendere che la malta di pietra verticale raggiunga una resistenza sufficiente. Quindi, applicare uno strato di malta secca (miscela cementizia 1:3) sulla superficie superiore, assicurandosi che sia compresso e si estenda 3 mm sopra la superficie verticale della pietra e 100 - 300 mm oltre il bordo della pietra. Cospargere la parte superiore con una soluzione liquida di cemento puro, posizionare le pietre superiori e picchiettare delicatamente con un martello di gomma per espellere l'aria.
6) Pulizia dei giunti:
Dopo l'installazione di tutte le pietre, pulire eventuali residui di malta, utilizzando un panno per pulire la superficie. Preparare la malta del colore coordinato e riempire le fughe, pulendo man mano che si procede per garantire una giuntura uniforme, stretta e pulita.
2. Standard di qualità:
1) La posa in pietra deve essere piana e stabile.
2) La consistenza dovrebbe essere uniforme e liscia.
3) Ispezione dell'aspetto: non deve verificarsi alcun sollevamento e la stuccatura (riempimento dei giunti) deve essere completa.
4) Elementi misurati:
| Tabella delle deviazioni consentite per l'installazione della pietra | |||
| No. | Articolo | Deviazione consentita (mm) | Metodo di ispezione |
| 1 | Planarità della superficie | 2 | Controllare con un righello da 2 m e un indicatore di riempimento a forma di cuneo |
| 2 | Allineamento giunto | 3 | Controlla con una linea da 5 m e un righello in acciaio |
| 3 | Differenza di altezza della cucitura | 0,2 | Controllare con un righello in acciaio e un indicatore di riempimento a forma di cuneo |
| 4 | Larghezza spazio tra le pietre | ≤2 | Controlla con un righello d'acciaio |